Checking the tire inflation pressure
-
After driving approximately 7~10 km (4~6 miles or about 10 min), stop at a safety location.
-
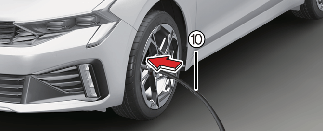
Connect the filling hose (10) of the compressor directly to the tire valve.
-
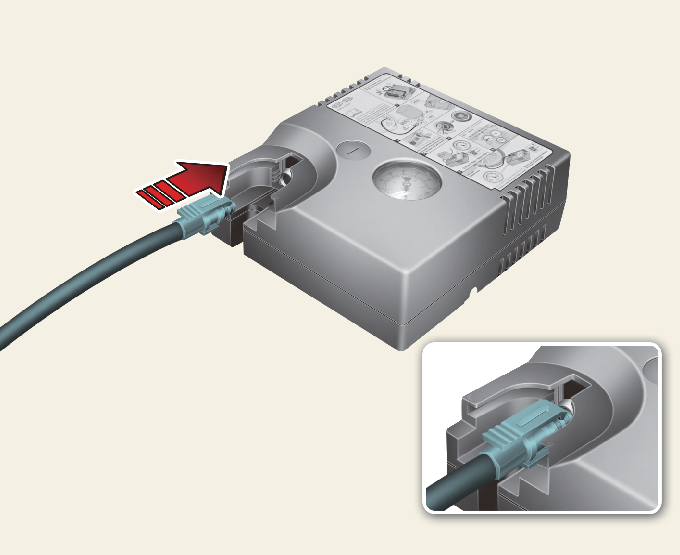
Connect between compressor and the vehicle power outlet using the cable and connectors.
-
Adjust the tire inflation pressure to the recommended tire inflation.
With the ignition switched on, proceed as follows.
-
To increase the inflation pressure : Switch on the compressor. To check the current inflation pressure setting, briefly switch off the compressor.
-
To reduce the inflation pressure: Press the button (9) on the compressor.
-

Do not let the compressor run for more than 10 minutes, otherwise the device will overheat and may be damaged.
The pressure gauge may show higher than actual reading when the compressor is running. To get an accurate tire reading, the compressor needs to be turned off.

If the inflation pressure is not maintained, drive the vehicle a second time, refer to More Details. Then repeat steps 1 to 4.
Use of the TMK may be ineffectual for tire damage larger than approximately 4 mm (0.16 of an inch).
We recommend that you contact a professional workshop if the tire cannot be made roadworthy with the Tire Mobility Kit.

The tire inflation pressure should meet the standard More Details or “Tire Inflation Pressure Standard Label” on the B pillar of the driver’s seat. If it is not, do not continue driving.
Call for road side service or towing.
Tire pressure sensor (if equipped with TPMS)
The sealant on the tire pressure sensor and wheel should be removed when you replace the tire with a new one and inspect the tire pressure sensors at a professional workshop. Kia recommends to visit an authorized Kia dealer/service partner.
When reinstalling the repaired or replaced tire and wheel on the vehicle, tighten the wheel lug nut to 11~13 kgf·m (79~94 lbf·ft).
Notes on the safe use of the Tire Mobility Kit
-
Park your car at the side of the road so that you can work with the TMK away from moving traffic. Place your warning triangle in a prominent place to make passing vehicles aware of your location.
-
To be sure your vehicle will not move, even when you’re on fairly level ground, always set your parking brake.
-
Only use the TMK for sealing/inflation passenger car tires. Do not use on motorcycles, bicycles or any other type of tires.
-
Do not remove any foreign objects-such as nails or screws -that have penetrated the tire.
-
Before using the TMK, read the precautionary advice printed on the sealant bottle!
-
Provided the car is outdoors, leave the engine running. Otherwise operating the compressor may eventually drain the car battery.
-
Never leave the TMK unattended while it is being used.
-
Do not leave the compressor running for more than 10 min. at a time or it may overheat.
-
Do not use the TMK if the ambient temperature is below -30°C (-22°F).
-
When the tire and wheel are damaged, do not use Tire Mobility Kit for your safety.
Technical Data
-
System voltage: DC 12 V
-
Working voltage: DC 10 - 15 V
-
Amperage rating: max. 15 A
-
Suitable for use at temperatures: -40 ~ +70 °C (-40 ~ +158 °F)
-
Max. working pressure: 6.2 bar (90 psi)
-
Size
-
Compressor: 140 x 150 x 60 mm (5.5 x 5.9 x 2.4 inches)
-
Sealant bottle: 104 x ø 85.5 mm (5.5 x 5.9 x 2.4)
-
Compressor weight: 795 g (1.75 lbs)
-
Sealant volume: 300 ml (18.3 cu. in.)
-
* Sealant and spare parts can be obtained and replaced at an authorized vehicle or tire dealer. Empty sealant bottles may be disposed of at home. Liquid residue from the sealant should be disposed of by your vehicle or tire dealer or in accordance with local waste disposal regulations.