Headrest (for rear seat)
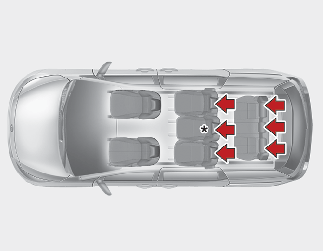
* : 2nd-row center headrest for 8 seats
The headrest not only provides comfort for passengers, but also helps protect the head and neck in the event of a collision.
To maximize the effectiveness in case of accidents, the headrest should be adjusted so the middle of the headrest is as high as the center of gravity of an occupant's head. Generally, the center of gravity of most people's heads is similar with the height as the top of their eyes.
Also, adjust the headrest as close to your head as possible. For this reason, the use of a cushion that holds the body away from the seatback is not recommended.
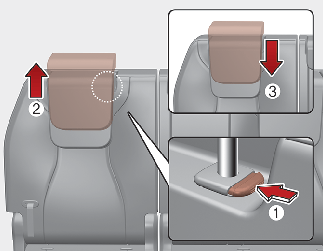
Adjusting the height up and down
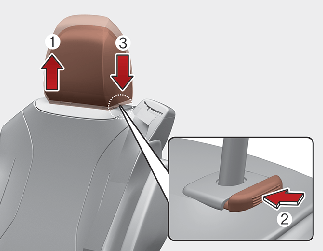
To raise the headrest:
-
Pull it up to the desired position (1).
To lower the headrest:
-
Push and hold the release button (2) on the headrest support.
-
Lower the headrest to the desired position (3).
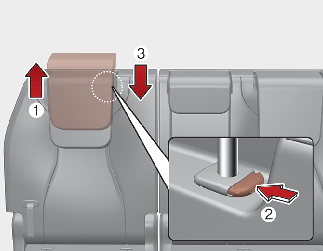
Removal and re-installation
To remove the headrest:
-
Raise it as far as it can go then press the release button (1) while pulling the headrest up (2).
To reinstall the headrest:
-
Put the headrest poles (3) into the holes while pressing the release button (1).
-
Adjust it to the appropriate height.
Make sure the headrest locks in position after adjusting it to properly protect the occupants.
After installing the headrest, make sure that it is installed in the right direction.
A headrest installed reversely could increase whiplash injury during rear impact.

Make sure the headrest locks in position after adjusting it to properly protect the occupants.
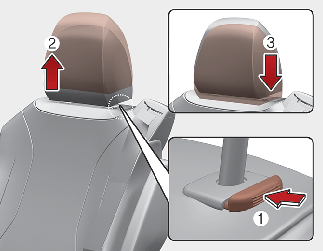
Forward and backward adjustment (if equipped)
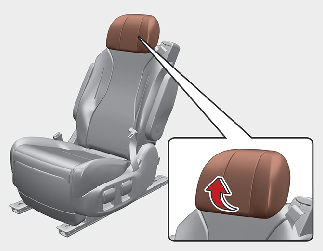
The headrest may be adjusted forward or backward by pulling the lower part of the headrest forward or backward to the desired detent in the direction of the arrow. Adjust the headrest so that it properly supports the head and neck.
Wing-out headrest (VIP Lounge Seat) (if equipped)
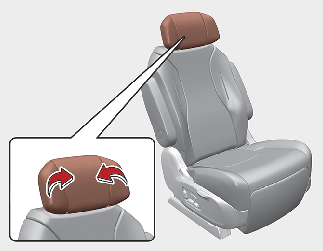
For rear outboard passenger's comfort, the ends of the headrest can be adjusted inward.