

Connecting the AC charger
-
Engage the brake pedal and apply the parking brake.
-
Turn all switches OFF, shift the gear to P (Park), and turn the vehicle OFF. If you initiate charging without the gear in P (Park), charging will start after the gear automatically shifts to P (Park).
-
Open the charging door.
For more information, refer to Charging door.
-
Check to make sure there is no dust on the charging connector and charging inlet.
-
Hold the charging connector handle and connect it to the vehicle charging inlet. Push the connector all the way in. If the charging connector and charging terminal are not connected properly, this might cause a fire.
For more information, refer to Charging status.
-
Start charging. If the charging connector and charging inlet are not connected properly, the connector may droop or vibrate. In this case, hold the charging connector handle and push it all the way in.
-
Check if the charging indicator light (
 ) of the high voltage battery in the instrument cluster is turned ON. Charging is not active when the charging indicator light () is off. If the charging connector is not connected properly, reconnect the charging cable to charge.
 OMV053214
 -
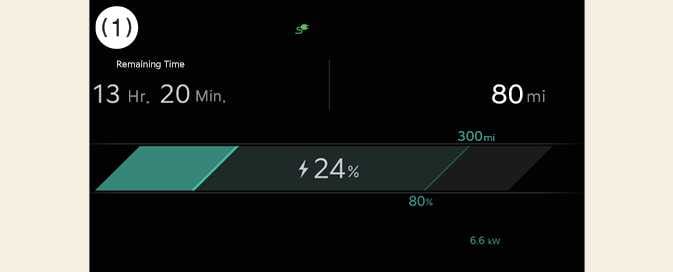
After charging begins, the instrument cluster displays the estimated charging time for about 1 minute.
The instrument cluster also displays the estimated charging time for about 1 minute if you open the driver side door while charging. When you set scheduled charging or scheduled air conditioning or heating, the instrument cluster displays the estimated charging time as “--”.
 OCV075021N
-
Remaining Time
-