Checking the tire inflation pressure
After driving briefly so as to distribute the sealant throughout the inside of the tire, you should check the tire inflation pressure.
-
After driving approximately 4~6 miles (7~10 km or about 10 minutes), stop at a safe location.
-
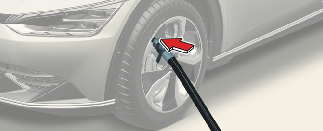
Connect the filling hose of the compressor (clip mounted side) directly and then connect the filling hose (opposite side) to the tire valve.
-
Connect between compressor and the vehicle power outlet using the cable and connectors.
-
Adjust the tire inflation pressure to the cold tire recommended pressure as indicated on the vehicle's placard or tire inflation pressure label located on the driver's side center pillar outer panel. (In this owner's manual, refer to More Details.)
-
To increase the inflation pressure, switch on the compressor, position I. To check the current inflation pressure setting, briefly switch off the compressor.
 NOTICE
The pressure gauge may show higher than actual reading when the compressor is running. To get an accurate tire reading, the compressor needs to be turned off.
 WARNING
Do not let the compressor run for more than 10 minutes; otherwise, the device may overheat and be damaged.
-
To reduce the inflation pressure, press the valve on the compressor.
 CAUTION
Tire Pressure Sensor
When you use the Tire Mobility Kit with a sealant that is not approved by Kia, the tire pressure sensors may be damaged by sealant. The sealant on the tire pressure sensor and wheel should be removed when you replace the tire with a new one and the tire pressure sensors should be inspected at an authorized dealer.
-