Trickle charger (portable charging cable)*
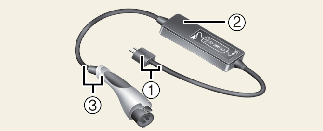
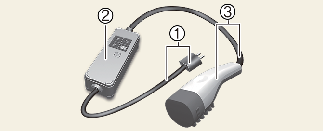
Trickle charger can be used if AC Charger is unavailable.
-
Plug and cable
-
Control box (ICCB)
-
Charging connector/cable
* : Depending on your region, this cable may not be provided in your vehicle.
How to connect portable charging cable (ICCB: In-Cable Control Box) (Type A)
-
Turn OFF all switches, move the shift dial to P (Park), and turn OFF the vehicle.
-
Connect the plug to a household electric outlet.

-
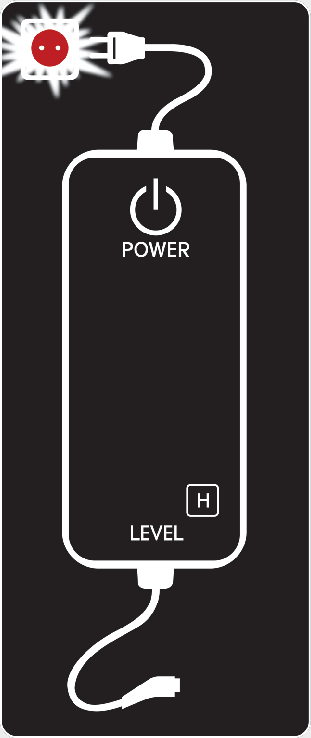
Make sure that the power connection indicator (green) lights in the control box.
-
Depress the brake pedal and apply the parking brake.
-
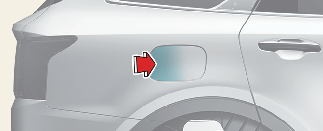
Open the charging inlet door by pressing rear centre edge of the charging inlet door.
-
Remove any dust on the charging connector and charging inlet.
-
Hold the charging connector handle.
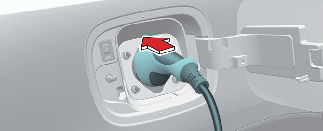 Vehicle connection
Then, insert it into the charging inlet, until you hear a click sound. If it is not fully connected, improper connection between the charging connector and the charging terminals are a potential fire hazard.
-
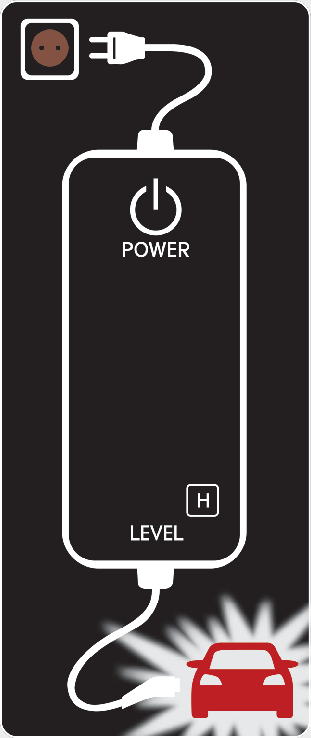
Charging starts automatically and the charging light blinks.
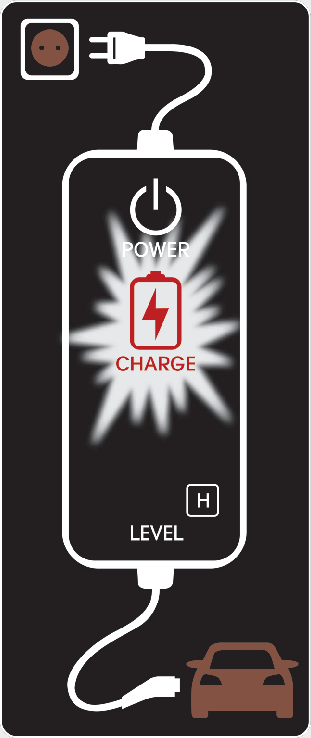
-
Check if the charging cable connection indicator of the high voltage battery in the instrument cluster is turned ON.

Charging does not occur when the indicator is OFF. When the charging connector is not connected properly, reconnect the charging cable to charge.
 NOTICE
-
The charging is in progress only with the shift dial is in P (Park). Charging the battery with the ENGINE START/STOP button in the ACC position is possible. However, it may discharge the 12-V battery. Thus, if possible, charge the battery with the ENGINE START/STOP button in the OFF position.
-
Moving the shift dial from P (Park) to R (Reverse)/N (Neutral)/D (Drive) stops the charging process. To restart the charging process, move the shift dial to P (Park), press the ENGINE START/STOP button to the OFF position, and disconnect the charging cable. Then, connect the charging cable and restart the charging process.
-
-
After charging has started, the estimated charging time is displayed on the instrument cluster for about 1 minute. It is also displayed, when the driver's door is opened with charging in progress. When scheduled charging is set, the estimated charging time is displayed as "--".
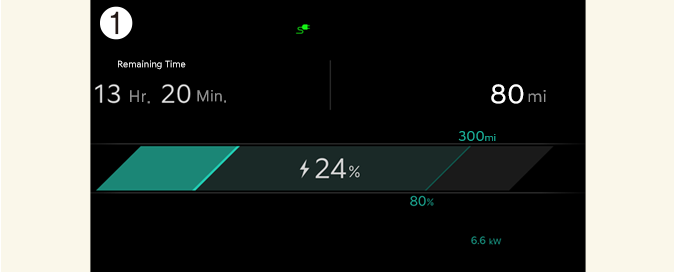
How to connect portable charging cable (ICCB: In-Cable Control Box) (Type B)
-
Turn OFF all switches, move the shift dial to P (Park), and turn OFF the vehicle.
-
Connect the plug to a household electric outlet.

-
Check if the power lamp (green) illuminates on the control box.
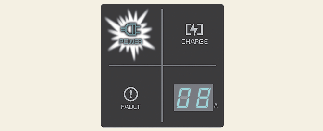
-
Depress the brake pedal and apply the parking brake.
-
Open the charging inlet door by pressing rear centre edge of the charging inlet door.

-
Remove any dust on the charging connector and charging inlet.
-
Hold the charging connector handle.
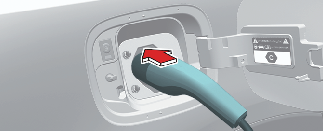
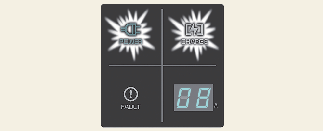
Then, insert it into the charging inlet, until you hear a click sound. If it is not fully connected, improper connection between the charging connector and the charging terminals are a potential fire hazard.
-
Charging starts automatically (charging lamp Iluminates).

-
Check if the charging cable connection indicator of the high voltage battery in the instrument cluster is turned ON.

Charging does not occur when the indicator is OFF. When the charging connector is not connected properly, reconnect the charging cable to charge.
 NOTICE
-
The charging is in progress only with the shift dial is in P (Park). Charging the battery with the ENGINE START/STOP button in the ACC position is possible. However, it may discharge the 12-V battery. Thus, if possible, charge the battery with the ENGINE START/STOP button in the OFF position.
-
Moving the shift dial from P (Park) to R (Reverse)/N (Neutral)/D (Drive) stops the charging process. To restart the charging process, move the shift dial to P (Park), press the ENGINE START/STOP button to the OFF position, and disconnect the charging cable. Then, connect the charging cable and restart the charging process.
-
-
After charging has started, the estimated charging time is displayed on the instrument cluster for about 1 minute. It is also displayed, when the driver's door is opened with charging in progress. When scheduled charging is set, the estimated charging time is displayed as "--".
 NOTICE
If the charging connector and charging inlet are not connected properly, the connector may droop or vibrate. In this case, hold the charging connector handle and push it all the way in.

Charging cable storage
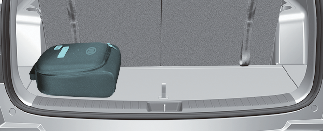
We recommend that the trickle charger cable should be put in the storage box after use.
Charging status indicator lamp for portable charging cable (Type A)
|
Control Box |
Indicator |
Details |
|
|---|---|---|---|
 |
PLUG |
 (Green) |
On: Power on Blink: Plug temperature sensor failure |
 (Red) |
On: Plug high temperature protection Blink: Plug high temperature warning |
||
|
POWER |
 |
On: Power on |
|
|
CHARGE |
 |
Blink: Charging In power saving mode, only the CHARGE indicator is appeared. |
|
|
FAULT |
 |
Blink: Charging interrupted |
|
|
CHARGE LEVEL |
 |
Charging current 12A |
|
 |
Charging current 10A |
||
 |
Charging current 8A |
||
|
VEHICLE |
 (Green) |
Charging connector plugged |
|
 (Blue) |
Charging |
||
 (Red) |
Blink: Charging impossible |
||
|
NO |
Control Box |
Status/Diagnosis/Countermeasure |
NO |
Control Box |
Status/Diagnosis/Countermeasure |
|---|---|---|---|---|---|
|
1 |
 |
Have the system inspected by a professional workshop. Kia recommends to visit an authorised Kia dealer/service partner. |
2 |
 |
|
|
3 |
 |
|
4 |
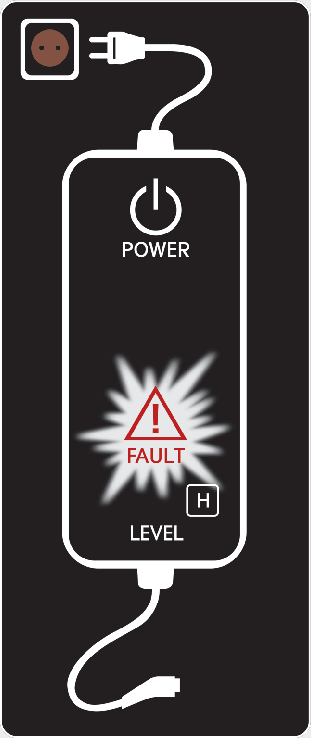 |
Have the system inspected by a professional workshop. Kia recommends to visit an authorised Kia dealer/service partner. |
|
5 |
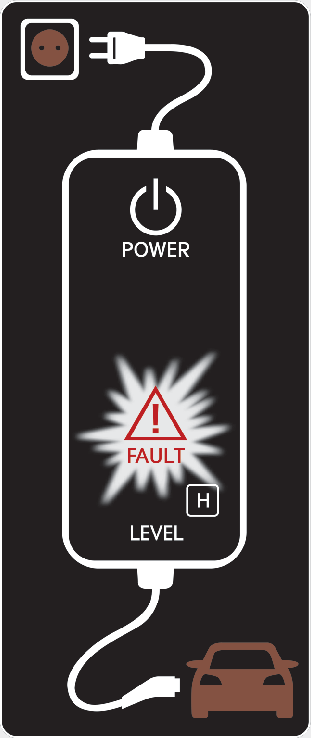 |
Have the system inspected by a professional workshop. Kia recommends to visit an authorised Kia dealer/service partner. |
6 |
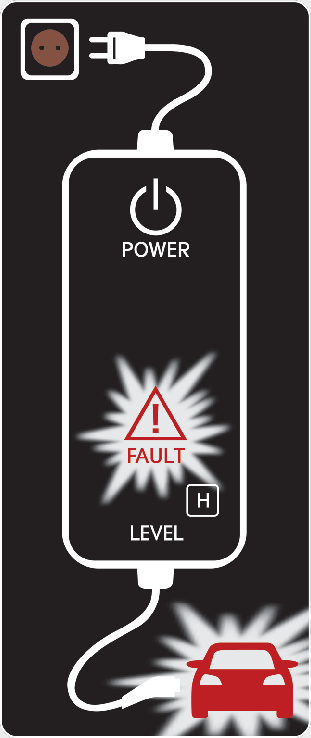 |
Have the system inspected by a professional workshop. Kia recommends to visit an authorised Kia dealer/service partner. |
|
7 |
 |
Have the system inspected by a professional workshop. Kia recommends to visit an authorised Kia dealer/service partner. |
8 |
 |
|
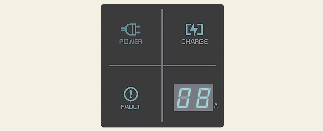
Charging Status Indicator Lamp for Portable Charging Cable (Type B)
|
Indicator |
Details |
|
|---|---|---|
|
POWER |
On: Power on |
|
|
CHARGE |
On: Charge Blink: Current limit due to high plug temperature or high internal temperature |
|
|
FAULT |
Blink: Charging interrupted |
|
|
CHARGE LEVEL |
12 |
12 A |
|
10 |
10 A |
|
|
08 |
8 A |
|
|
06 |
6 A |
|
|
The charging current changes whenever the button (1) is pressed for less than 1 sec with the charger plugged into an electrical outlet but not the vehicle. 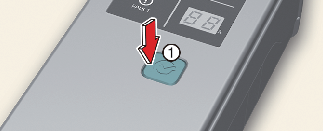 |
||
|
Indicator |
Details |
||
|---|---|---|---|
|
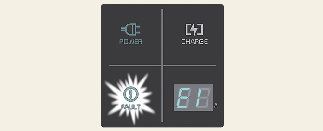
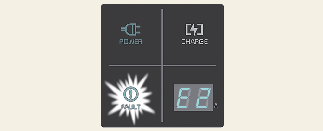
Error code |
On : Error whilst charging/ Error during self-diagnosis |
||
|
Error code |
Item |
Cause |
|
|
E1 |
CP communication |
Vehicle communication error |
|
|
E2 |
Leakage |
Current leakage |
|
|
E3 |
Charger error |
||
|
E4 |
Plug temperature |
Plug overtemperature warning |
|
|
E5 |
Plug temperature failure |
||
|
E6 |
Charger error |
||
|
E7 |
Overcurrent |
Charging overcurrent warning |
|
|
E8 |
Internal temperature |
Charger overheating |
|
|
E9 |
Charger error |
||
|
F1 |
Relay fusion |
Charger error |
|
|
F2 |
GM/I |
Poor grounding of outlet |
|
|
F3 |
SMPS Power failure |
SMPS error (voltage failure) |
|
|
F4 |
SMPS error (abnormal voltage) |
||
|
F5 |
CP voltage error |
CP (-) voltage error |
|
|
F6 |
CP (+) voltage error |
||
|
F7 |
Temperature sensor error |
Plug temperature sensor error |
|
|
F8 |
PCB internal temperature sensor error |
||
Status/Diagnosis/Countermeasure

-
Charging connector plugged into vehicle (POWER Green ON)
-
Plug connected to an electric outlet (POWER Green ON)

-
Charge indicator (POWER Green ON/CHARGE Blue ON)
-
Charging current
-
Abnormal temperature
-
CCB (In-Cable Control Box) failure

-
Diagnostic device failure
-
Current leakage
-
Abnormal temperature
-
After disconnecting and reconnecting the power plug, press and release the button for 2 seconds or longer to clear the error.
-
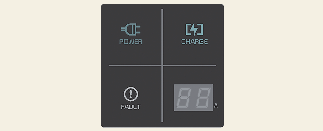
Charge level indicator is turned off if there is no status change for more than 1 minute.
How to disconnect portable charging cable (ICCB: In-Cable Control Box)
-
Before disconnecting the charging connector, make sure the doors are unlocked. When the door is locked, the charging connector lock system will not allow disconnection. To prevent charging cable theft, the charging connector cannot be disconnected from the inlet when the doors are locked. However, if the vehicle is in the charging connector AUTO mode, the charging connector automatically unlocks from the inlet when charging is completed.
 NOTICE
In order to disconnect the charging connector, unlock the doors to unlatch the charging connector lock system. If not, the charging connector and the vehicle's charging inlet may be damaged.
-
Hold the charging connector handle and pull it out.

-
Make sure to securely close the charging door.
-
Disconnect the plug from the household electric outlet. Do not pull the cable when disconnecting the plug.

-
Close the protective cover for the charging connector so that foreign material cannot get into the terminal.
-
Put the charging cable inside the cable compartment to protect it.
Precautions for portable charging cable (ICCB: In-Cable Control Box)
-
Use the portable charging cable that is certified by Kia.
-
Do not try to repair, disassemble, or adjust the portable charging cable.
-
Do not use an extension cord or adapter.
-
Stop using immediately if failure warning light occurs.
-
Do not touch the plug and charging connector with wet hands.
-
Do not touch the terminal part of the AC charging connector and the AC charging inlet on the vehicle.
-
Do not connect the charging connector to voltage that does not comply with regulations.
-
Do not use the portable charging cable if it is worn out, exposed, or there exists any type of damage on the portable charging cable.
-
If the ICCB case and AC charging connector is damaged, cracked, or the wires are exposed in any way, do not use the portable charging cable.
-
Do not let children operate or touch the portable charging cable.
-
Keep the control box free of water.
-
Keep the AC charging connector or plug terminal free of foreign substances.
-
Do not step on the cable or cord. Do not pull the cable or cord and do not twist or bend it.
-
Do not charge when there is lightning.
-
Do not drop the control box or place a heavy object on the control box.
-
Do not place an object that can generate high temperatures near the charger when charging.
-
Charging with the worn out or damaged household electric outlet can result in a risk of electric shock. If you are in doubt to the household electric outlet condition, have it checked by a licensed electrician.
-
Stop using the portable charging cable immediately if the household electric outlet or any components is overheated or you notice burnt odors.
Actions to be taken for electric vehicle charging issues
When you cannot charge the high voltage battery after connecting the charger, check the following:
-
Check the charging settings for the vehicle.
(e.g. when scheduled charging is set, charging is not initiated immediately when the AC charger or portable charger is connected.)
-
Check the operation status of the AC charger, portable charger.
(Status of portable charger)
* Actual method for indicating the charging status may vary in accordance with the charger manufacturer.
-
When the vehicle does not charge and a warning message appears on the instrument cluster, check the corresponding message.
-
If the vehicle is properly charged when charged with another normally working charger, contact the charger manufacturer.
-
If the vehicle does not charge when charged with another normally working charger, we recommend that you contact an authorised Kia dealer/service partner for inspection.