How to Use Trickle Charge
-
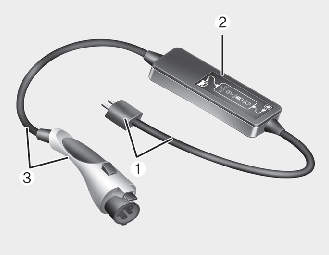
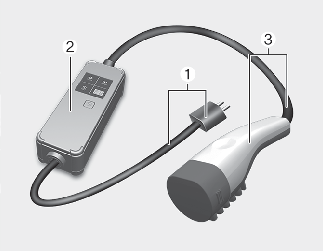
Code and Plug (Code set)
-
Control Box
-
Charging Cable and Charging Connector
When you cannot drive to a public charging station due to low battery, you can charge the car by using the Portable Charging Cable (ICCB: In Cable Control Box)
-
This cable is designed to prevent problems caused by unexpected battery discharge and when you use general outlets, it may lead to excessive electricity charges as the electricity charges for electric vehicles will not be applied. So refrain from using it to fully charge your car.
-
If this cable is connected to a household power source, it may exceed the capacity of the distributor, resulting in safety problems such as electrical shutdown and fire.
How to Set the Charge Level of the Portable Charger (Type A)
-
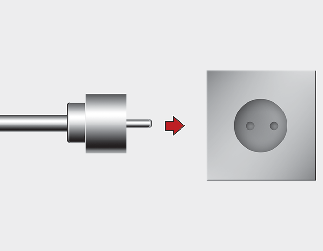
Check the outlet’s current rating before connecting the plug to the outlet.
-
Connect the power plug to the household electrical outlet.
-
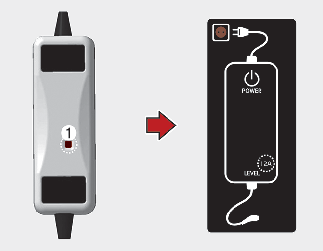
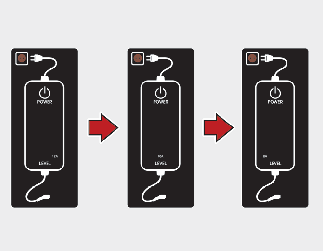
Check the status of the control box display.
-
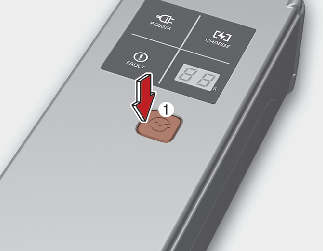
Adjust the charging current by pressing the button (1) on the back of the control box for more than 1 second. (Refer to More Details.)
-
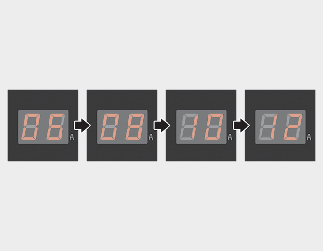
Each time the button (1) is pressed, the control box display is sequentially changed to 12A, 10A and 8A.(*1,*2)
-
Once the charging current setting is complete, start charging according to Trickle Charge procedure.
*1: MAX 10A: 10A, 8A, 6A*2: MAX 8A: 8A, 7A, 6A
* Examples of ICCB Charging Current Setting
(However, examples are only for reference and situations may vary depending on the surrounding environment.)
|
Outlet current |
ICCB charge level |
Control box display |
|---|---|---|
|
14-16A |
12A |
Type A
 Type B
 Type C
 |
|
13-12A |
10A |
|
|
11-10A |
8A |
|
|
9-8A |
7A or 6A |
How to Set the Charge Level of the Portable Charger (Type B)
-
Check the rated current of the electric outlet prior to connecting the plug to the outlet.
-
Connect the plug to a household electric outlet.

-
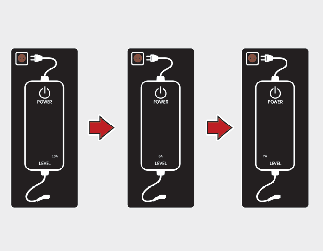
Check the display window on the control box.
-
Press the button (1) on the back of the control box for 2 to 8 seconds to adjust the charge level. (Refer to charging cable type and example for setting the charge level.)
-
The charge level on the display window of the control box changes every time you press the button (1).
-
When setting the charge level is complete, start charging according to the portable charge procedure.
※ Example for setting the ICCB charge level
The example is only for reference and may vary according to the surrounding environment.
|
Category |
ICCB charge level |
Control box display window |
|---|---|---|
|
14-16A |
12A |
 |
|
13-12A |
10A |
|
|
11-10A |
8A |
|
|
9-8A |
6A |

Please make sure that charge level selection matches the capacity of your circuit breaker to avoid blown fuse.