Front seat adjustment
Forward and backward (driver seat)
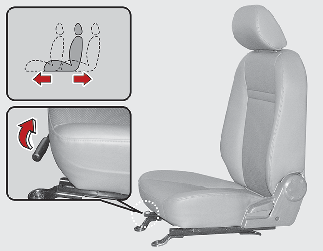
To move the seat forward or backward:
-
Pull the seat slide adjustment lever under the front edge of the seat cushion up and hold it.
-
Slide the seat to the position you desire.
-
Release the lever and make sure the seat is locked in place.
Adjust the seat before driving, and make sure the seat is locked securely by trying to move forward and backward without using the control lever. If the seat moves, it is not locked properly.
seatback angle (if equipped)
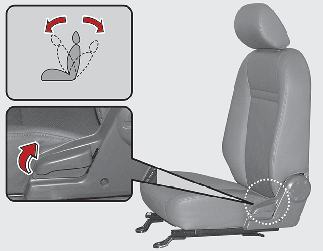
To recline the seatback:
-
Lean forward slightly and lift up on the seatback recline lever located on the outside of the seat, at the rear.
-
Carefully lean back on the seat and adjust the seatback to the position you desire.
-
Release the lever and make sure the seatback is locked in place. (The lever MUST return to its original position for the seatback to lock.)

Driving or riding in a vehicle with a front seatback reclined could lead to serious or fatal injury in an accident. If a front seat is reclined during an accident, the occupant’s hips may slide under the lap portion of the safety belt applying great force to the unprotected abdomen or neck. Serious or fatal internal injuries could result. Keep the seatbacks in a comfortably upright position whenever the vehicle is in motion.
Lumbar support (for driver’s seat, if equipped)
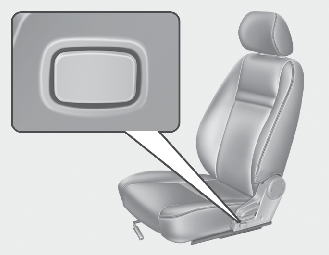
The lumbar support can be adjusted by pressing the lumbar support switch on the side of the seat.
-
Press the front portion of the switch to increase support, or the rear portion of the switch, to decrease support.
-
Release the switch once it reaches the desired position.
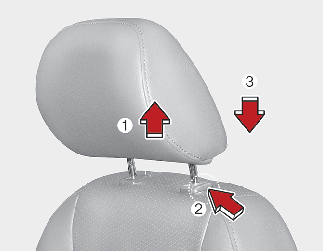
Headrest (for front seat)
Adjusting the height up and down
The headrest not only provides comfort for the driver and passengers, but also helps to protect the head and neck in the event of a collision.
To raise the headrest, pull it up to the desired position (1).
To lower the headrest, push and hold the release button (2) on the headrest support and lower the headrest to the desired position (3).
For best protection, adjust the headrest so its center is as high as your ears.
-
For maximum effectiveness in case of an accident, the headrest should be adjusted so the middle of the headrest is at the same height of the center of gravity of an occupant's head. Generally, the center of gravity of most people's head is similar with the height of the top of their eyes. Also, adjust the headrest as close to your head as possible. For this reason, the use of a cushion that holds the body away from the seatback is not recommended.
-
Do not operate the vehicle with the headrests removed. Severe injury to the occupants may occur in the event of an accident. Headrests may provide protection against neck injuries when properly adjusted.
-
Do not adjust the headrest position of the driver’s seat while the vehicle is in motion.

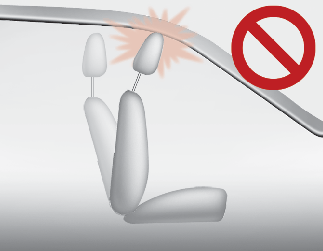
If you recline the seatback towards the front with the headrest and seat cushion raised, the headrest may come in contact with the sun visor or other parts of the vehicle.
Removal/Reinstall
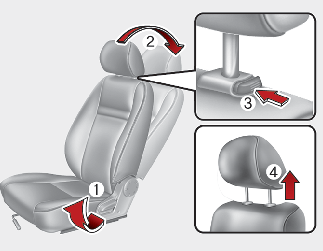
To remove the headrest:
-
Recline the seatback (2) with the recline lever (1).
-
Raise headrest as far as it can go.
-
Press the headrest release button (3) while pulling the headrest up (4).
NEVER allow anyone to ride in a seat with the headrest removed.
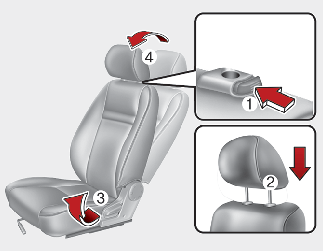
To reinstall the headrest :
-
Put the headrest poles (2) into the holes while pressing the release button (1).
-
Recline the seatback (4) with the recline lever (3).
-
Adjust the headrest to the appropriate height.
Always make sure the headrest locks into position after reinstalling and adjusting it properly.
To reduce the risk of head and neck injuries, do not drive the vehicle with the headrest removed or improperly positioned.
Do not adjust the driver’s headrest while driving.